When we decided to put counter tops in our kitchen...it wasn't hard to decide that we were NOT going with standard issue kitchen ware...we, of course, wanted free, charming, handmade ones! There was one tiny cupboard and of course the Hoosier bottom in there when we first got the house...no counter top space at all and no storage....

The molding on the ceiling was cheap standard molding used to cover up the ceiling tile seams but the molding on the bottom near the floor was gorgeous 8" mop board from way back when...the quarter round had been removed but other than that it was in beautiful shape...We tore all the top molding out to get to the bead board ceiling and used some of the scrap on the cupboards...so where do you get free counter tops, molding, storage...space to prep food?

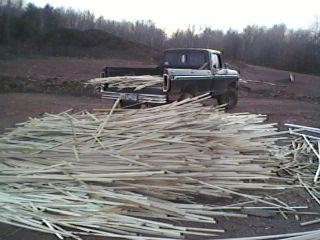
PALLETS!
Mostly big item pallets..NOT.the the standard 4x8 shipping pallet....but ones with long boards? you can get them from Automotive Paint shops and Automotive Body shops that do repair on wrecked cars...

These are waaaaay easier to take apart as they do not have the horrid grabby nails that most standard pallets have and they are gorgeous 2x4x10 and 1x4x10 boards...no dog legs...:)
My Honey started with a basic frame screwed directly to the wall...we have all solid wood walls but with a stud finder, you could screw them to the wall by finding the studs....I have to remind everyone...we have absolutely NO building skills...we search on the net for answers to our questions and then try our luck...my Honey is very adaptable and has learned wiring, plumbing and building with little help other than books, the net and by word of mouth information...so if we can do this? Anyone with imagination can!


Same for the other side of the sink...He then screwed a 1x8x6 foot board for a face board across the front to match the sink skirt...you could always laminate the 1x4's together too...and attached the found table legs by screwing them to the wall....they do NOT support the counter tops in any way..they are solely decorative....
On the other side...since we decided on a shelf...he did the exact same thing in a smaller proportion...

 |
| brace attached to front 2x4 of frame as there was no support on this side |
and screwed 1x4 slats 1/4" apart along the shelf....


He then screwed 1/2" plywood to the tops of both sides...


The other side...we left open for somewhat of a breakfast bar....

Again..the table legs are purely decorative and hold nothing up...you can stand on these...we did it...lol!
A little paint.....

And one very large drawer with casters to keep dog and cat hair out....

And you have an almost free (paint cost and screws ($28.00) charming set of kitchen countertops....


Ikea has solid wood 2" butcher block pieces up to 8' long for $80.00...they would look gorgeous in this kitchen...and they would fit nicely lipped up against the sink....AND...you would have TWO beautiful cutting boards with the excess....attach handles and you could hang them up out of the way!
As far as the molding? we went with what was normal for the house....1x4 boards around the top....all from pallets....


We also gleaned scraps of 1/4 round from the city compost pile to put back around the mop boards on the floor....you can also get these directly from a wood molding shop...they throw out tons!
Right before I gave away the house....
What???? What do you mean you gave away the house???? What happened??? You tease, you! ;0)
ReplyDeleteNo...not teasing...lol! We really did give it away...lol! it's a shock but on to new adventures!
ReplyDeleteOh yes... I love this kitchen.
ReplyDeleteI Hope you leave these pictures on here and don't ever start a different blog. Because I come here and look at your beautiful kitchen ALL THE TIME!
...I'm gonna miss this place.(she says, like she's been there before) ;) Pat
I won't start a different blog...I will just add on to this one! all the pictures will stay up and as always...any help I can be just email me!
ReplyDeleteOh...and Pat? I feel like you and I have always been sitting in that kitchen drinking coffee...discussing chickens and what not...I feel like you HAVE been there...
ReplyDeleteWhat?! Hopefully another blog post soon to hear that story! Love your ideas, especially how you enclosed your garden. Am going to do the same to ours this spring. Thanks for blogging!
ReplyDeleteThe story is in the previous post, Jana! I know...two in one day after all this time! lol! would love to see your garden!
ReplyDeleteWOW !!!!!!!
ReplyDeleteThat's all I can think to say.
Please tell me you took your beloved iron bed and that super cool stove with you.
Glad to see you back blogging again and can't wait to hear the "new" adventures of Lisa and her Husband.
Vanessa
HI VANESSA!! I took the bed but the stove is for sale! the design plans for our new house only accommodate one cooking and heat source so we have decided on a Margin Gem that will cook, heat and heat water!
ReplyDeleteI love your blog and following along with the property transformation. I will be excited to see your new place The new owner must be totally thrilled!! It would be fun if she started a blog so we could continue with the evolution of this little gem.( :
ReplyDelete