I have always wanted a greenhouse...I use a cold frame which consists of a plywood and 2x4 box with a recycled glass door for a cold frame...the bottom is open to the dirt, the plants are started in the basement under a $10.00 shop light and transferred into this box, which faces South... in March...

from March to June...my lil plants go crazy in there! they go so crazy that the box is soon over run with plants that want OUT! Sooo...even though I am stuck in Wyoming with no garden this spring I have been researching green house ideas...

This one is one of the best representations...cost wise...that I have ever seen!
It comes from this site...http://ana-white.com/2012/05/plans/barn-greenhouse which is a fantastic representation of DIY!
She has plans for EVERYTHING! materials lists, detailed instructions and plenty of advice to boot! I priced this lil gem...her plans represent about $700 in materials...
BUT...I have a cost saving idea...
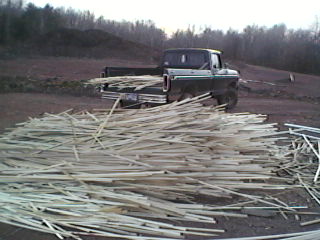
To frame the bottom...use pallets! My favorite recycled building material...I drove round the area I am in...there are no less than 1000 pallets on any given day...destined for the land fill....
Lay a treated landscape timber (which are a really inexpensive alternative to a 4x4) down with flat side up...put the full shipping pallet on the top of the landscape timber, screw it to the timber every 4 inches...attach each corner of the pallet with small bolts or screws... and then sheet it with the metal roofing...
Pallets make a nice straight wall and are super sturdy!
Tip: Roofing companies sell or discard the outer packing sheets of metal roofing...which...are sheets of metal roofing! Free or cheap instead of new...I got most of the tin panels for my shed for free! from a roofing job that was being done on a bar in my area...
Take some pallets apart and use the 2x4's to frame the rest of the wall as tall as you want...I would not go with the gambrel/barn roof...cuz...well...my carpentry skills are not very good! lol! and the gable roof would cut down on the amount of lumber needed... I would just build the wall up with 2x4 general framing and lay a top plate around the whole thing....and go with a simple gable roof with the corrugated plastic sheeting horizontal on the 2x4 wall framing...and then vertical on the roof...to shed rain and snow...
This guy made a house out of pallets...
Roof framing has been incredibly difficult for me to learn..I have the hang of it now but still not quite comfy with the idea of doing it by myself...but we all know SOMEONE that may be willing to help with this project....and my Hubby seems to think this would be a very simple one!
All in all...my estimation of cost if I used the gleaned pallets and free scrap wood...and a free/cheap/recycled tin sheeting...it would cut the cost to about $200.00 for the corrugated plastic sheets...and screws...maybe some clear caulking...
Considering the expense of greenhouses today? I thought this one was a very nice looking and inexpensive, sturdy greenhouse...
Go way snow!

from March to June...my lil plants go crazy in there! they go so crazy that the box is soon over run with plants that want OUT! Sooo...even though I am stuck in Wyoming with no garden this spring I have been researching green house ideas...
This one is one of the best representations...cost wise...that I have ever seen!
It comes from this site...http://ana-white.com/2012/05/plans/barn-greenhouse which is a fantastic representation of DIY!
She has plans for EVERYTHING! materials lists, detailed instructions and plenty of advice to boot! I priced this lil gem...her plans represent about $700 in materials...
BUT...I have a cost saving idea...
To frame the bottom...use pallets! My favorite recycled building material...I drove round the area I am in...there are no less than 1000 pallets on any given day...destined for the land fill....
Lay a treated landscape timber (which are a really inexpensive alternative to a 4x4) down with flat side up...put the full shipping pallet on the top of the landscape timber, screw it to the timber every 4 inches...attach each corner of the pallet with small bolts or screws... and then sheet it with the metal roofing...
Pallets make a nice straight wall and are super sturdy!
 | |
| Duck fence |
 | |
| Landscape timber/pallet framing on shed |
Take some pallets apart and use the 2x4's to frame the rest of the wall as tall as you want...I would not go with the gambrel/barn roof...cuz...well...my carpentry skills are not very good! lol! and the gable roof would cut down on the amount of lumber needed... I would just build the wall up with 2x4 general framing and lay a top plate around the whole thing....and go with a simple gable roof with the corrugated plastic sheeting horizontal on the 2x4 wall framing...and then vertical on the roof...to shed rain and snow...
This guy made a house out of pallets...
 |
| http://www.tinyhousedesign.com/tag/pallet-house/ |
Roof framing has been incredibly difficult for me to learn..I have the hang of it now but still not quite comfy with the idea of doing it by myself...but we all know SOMEONE that may be willing to help with this project....and my Hubby seems to think this would be a very simple one!
 | |
| Simple roof design |
All in all...my estimation of cost if I used the gleaned pallets and free scrap wood...and a free/cheap/recycled tin sheeting...it would cut the cost to about $200.00 for the corrugated plastic sheets...and screws...maybe some clear caulking...
Considering the expense of greenhouses today? I thought this one was a very nice looking and inexpensive, sturdy greenhouse...
Go way snow!